Take the OmGym Suspension System everywhere you go!
Easily set up in 60 seconds or less!
- Weighs only 3.5 pounds
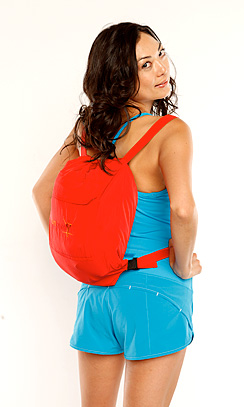
- Travels in a matching mini backpack for fitness lovers on the go
- Set-up on Trees, Kids' Playgrounds, Ceiling Hooks, Support Beams, Gym Equipment, OmGym Stands, Inversion Rack, Porches and more...

Easy Set-up Instructions for a bar or tree:
- Choose a secure bar or sturdy horizontal support that is at least 8 inches higher than the top of your head. Ideally, there should be at least one meter of space in all directions around you when you stand underneath of the bar.
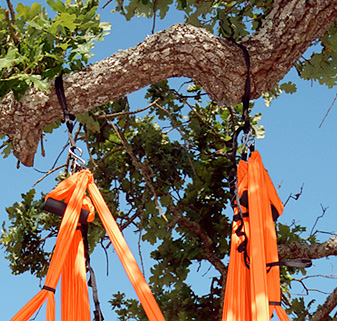
- Hang an adjustment strap over the bar, threading the strap through the top loop (the largest loop). Repeat for the second anchor strap, placing the two straps about hip-width apart.
- From here, easily attach the “S” hooks as directed in the instructional wallposter.
Hint: Remember to review our safety guidelines for info on set-up safety, equipment care, contraindications, safety accessories and more.

Ceiling Hooks
You will need:
- Either a stud finder or hammer with small nail
- Drill with 1/8 inch wood drill bit
- 2-3 Lag screw eye bolts rated for 250 pounds or more each (3 for optional hammock use)
- Marker
- Stepping stool (optional)
- Carabiners (optional)
- Extension Rope/Strap (optional)
- Locate 2 support beams (joists) that you would like to use to install the eye-bolts. You can do this by tapping a small nail into the ceiling or by using a stud finder. Support beams are usually 16 or 24 inches apart. Both are acceptable measurements to suspend the equipment, although it is great to keep in mind that hanging the equipment so that it is aligned with the width of your hips is ideal. You can put one eye bolt in each beam to maximize support strength. If you are at all unsure of the strength of your indoor overhead support due to water damage, termites, or any other reason, please seek professional assistance before setting up the OmGym Suspension System. Note: Support beams are strongest when they are closest to the wall. Look for an area that will allow you to move freely, yet remain in close proximity to the wall. (Approximately 3-4 feet from the wall is best).
- Locate and mark two points on the ceiling for drilling. They should both be in the center line of the width of the beam. Positioning the eye bolts in the center line of the width of the beam is important to maximize the weight-bearing capacity of the hidden beam.
Note: A third eye bolt can be installed approximately 6 feet further for hammock use. In this case, mark the third point as well, at the center line of the third beam. Continue, following the directions, with three eye-hooks.
- With a wood drill bit, drill 1/8 inch holes at the marked points. Make sure the holes are drilled 5-6 inches deep and perpendicular to the ceiling.
- Screw the lag screw eye bolts into the holes, until all threads have disappeared. Do not loosen them or adjust them once in place.
- You can now attach the OmGym Suspension System using carabiners (sold separately) or the adjustment straps (included) only. For ceilings higher than 8 feet, extending straps may be used first. The adjustment straps of the OmGym Suspension System are designed to be used under an 8 foot ceiling and high ceilings may offer less adjustment options, unless extending straps are used.
Carabiners are advantageous to use as they allow the user to attach and detach the equipment in less than 5 seconds. This is especially helpful for those on the go or if the OmGym Suspension System is used in a small space that needs to be used for other purposes regularly. If each of the 2 adjustment straps are attached to carabiners, then the carabiners can easily connect to or disconnect from the eye bolts
To attach the adjustment straps directly, thread the large loop of one adjustment strap through the eye of an eye bolt. Similar to the procedure for setup on a bar or tree, feed the entire strap through the large loop and pull to tighten. The adjustment strap should then securely dangle down from the eye bolt. Repeat with the second adjustment strap and eye-bolt.
Once the adjustment straps are attached, hook each “S” hook of your sling at any level, using the loop of your choice. Then hang the handle sets at the level of your choice.
Note: Extra adjustment straps or rope may be purchased for spaces with high ceilings (recommended for ceilings above 9 feet)
WARNING: CEILING HOOKS / EYE BOLTS MUST BE INSTALLED WITH CAUTION. WE STRONGLY ADVISE PROFESSIONAL EVALUATION AND INSTALLATION BEFORE USE. OMGYM LLC DOES NOT ACCEPT RESPONSIBILITY OR LIABILITY FOR ANY INJURIES OR DAMAGES DUE TO ANY MALFUNCTION OR DAMAGING OCCURRENCE. USER ACCEPTS ALL RISK AND/OR LIABILITY. USE EQUIPMENT ONLY AS DIRECTED. DO NOT SWING OR SPIN IN THE OMGYM SUSPENSION SYSTEM WHEN USING CEILING HOOKS. CHECK SAFETY GUIDELINES FOR MORE INFORMATION.
back to topHammock Use

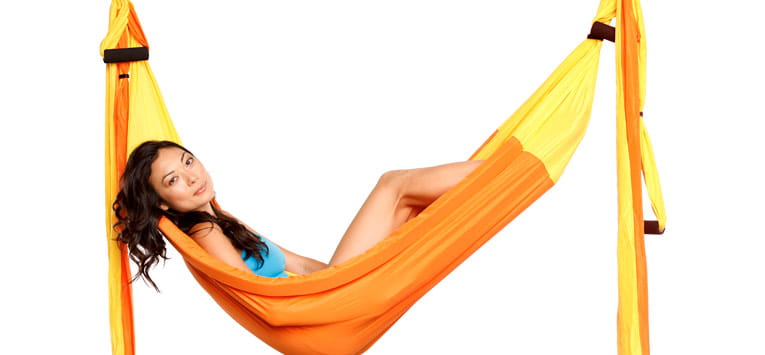
To use the OmGym Suspension System as a hammock, tie the straps as directed for bar/tree set-up, but spread then wider, with at least six feet of space in between them. Make sure the fabric adjusters are moved to the most outward position to allow the fabric to fully spread.
back to top


